Alright, in this guide, I’ll be going over on how to create characters (rigs) in Roblox studio, as per request. Also, this will be going over the generic AO style rigs.
How to insert a rig into Roblox studio
So, the first thing you are gonna need is a character, they will be called a rig from now on as that’s how they are reffered to in Roblox studio, I have linked a free model for you to use.
https://create.roblox.com/store/asset/88372714577017/Arcane-Odyssey-base-rig
Going into studio and placing the model listed above, you will now have a rig to work with.
You can do absolutely anything with it, colour it, change the body parts, add hats etc. I’ll be going over the few basics on what can you do.
How to add Accessories into Roblox studio
To add hats, you will need some sort of way to get assets into Roblox studio, which can be done either via script or a plugin. When it comes to plugins, you have couple of variations.
If you want to use the script variant, you need to insert this script into the command bar, if it’s not activated, you can find it in the view tab.

The script :
game:GetService("InsertService"):LoadAsset(INSERT ASSET ID HERE).Parent=Game.WorkspaceThis will insert an asset the workspace, which is gonna usually be a accessory.
You need to replace the INSERT ASSET ID HERE in the script to some actual ID. When you open an accessory from the catalog, the Accessory ID will be in the url.
![]() (for example)
(for example)
If you plan on using the faster version, a plugin, you can download one from the toolbox, I personally use this one :
https://create.roblox.com/store/asset/608057817/Insert-Asset
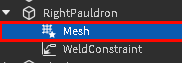
How to Weld an Accessory (Important)
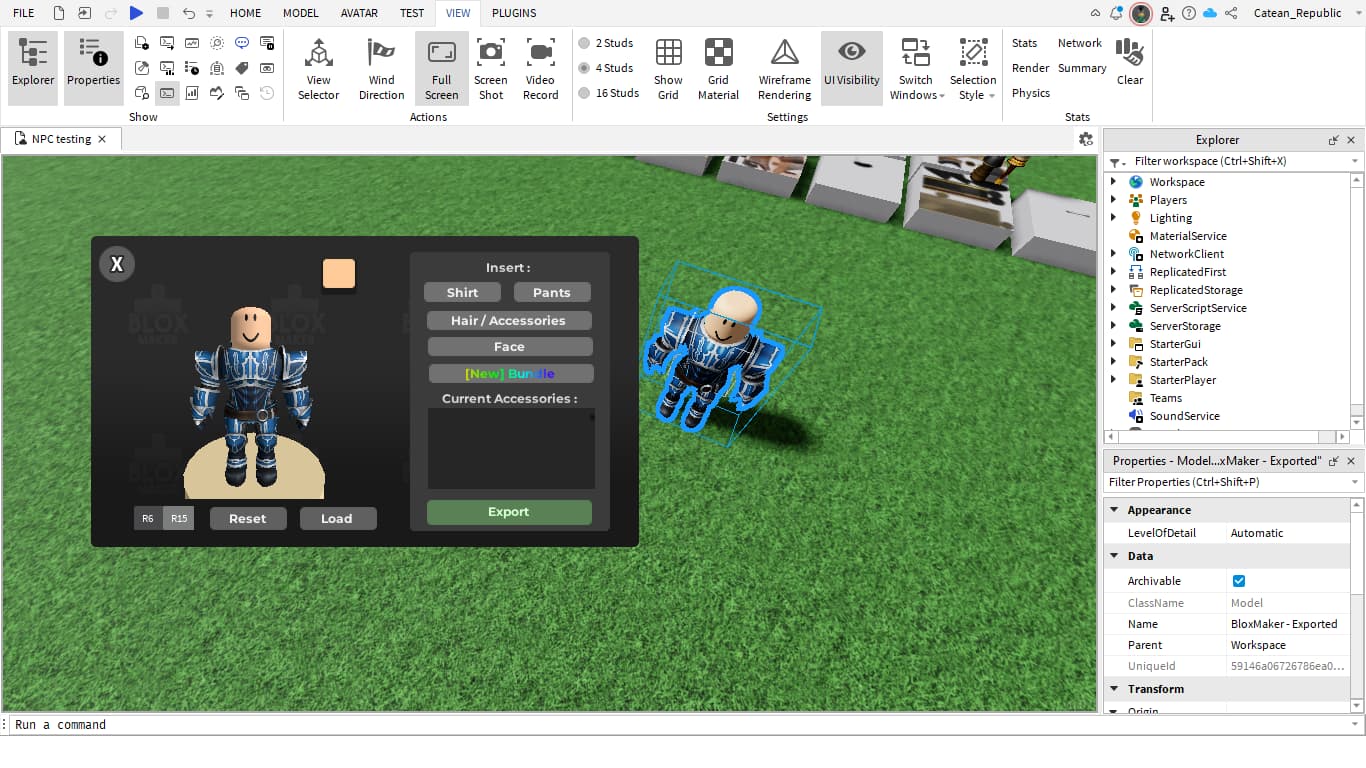
Now that you have your asset in Roblox studio, you can start adding them to the rig, which can be simply done by dragging the Accessory into the Rig, so in the end it will look something like this :
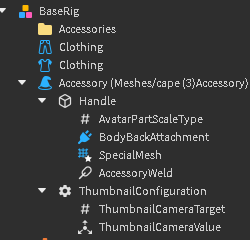
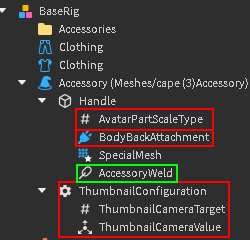
Right underneath are the stuff that you don’t want in the accessory, those are highlighted red, the green highlight means you need to replace it, and you will replace the Weld with a WeldConstraint, a much simplier version of a Weld (?).
Screen capture - 76f8804b4b01df82f708e266274eb39d - Gyazo
The weld NEEDS to be welded to the accessory and the body parts that it will move alongside it, so for example, if you have a cape accessory like i do in this video, you weld it to the UpperTorso.
That’s pretty much it with adding accessories to studio. You can retexture them, which i’ll go over in the next part.
How to change bodyparts
To change the body parts, you need to find a suitable character/package on the catalog. So for example, The titanium armor in AO uses Enchanted Redcliff Knight bundle, which I’m gonna use for this tutorial.
You are probably gonna need to use a browser plugin for this part, download BTRoblox plugin from the chrome plugin store. (Can skip if you have some sort of plugin in Studio)
Now that you have all the necessary stuff, it’s time to change the body parts.
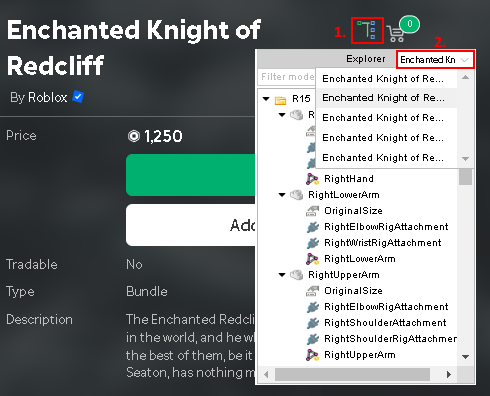
At 1., you are gonna click the Explorer icon to open it.
At 2., you can change which body part or accessory (if the character/package has one) is selected.
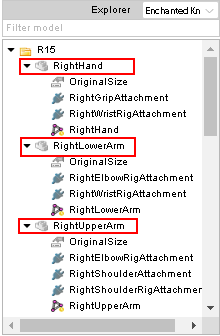
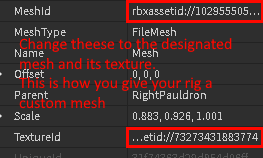
Here are the parts you click, it will show you the part’s properties, amongst which is the texture and mesh, they are important for you right now.
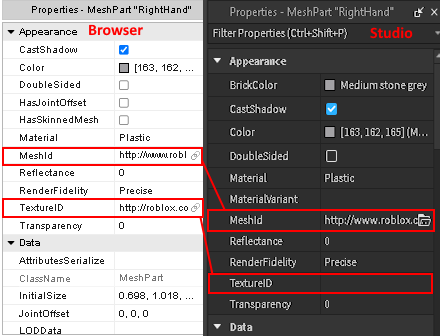
You are gonna replace the MeshId and TextureId in the Studio with the browser Ids. You have to adjust he bodyparts manually so they dont look disconnected.
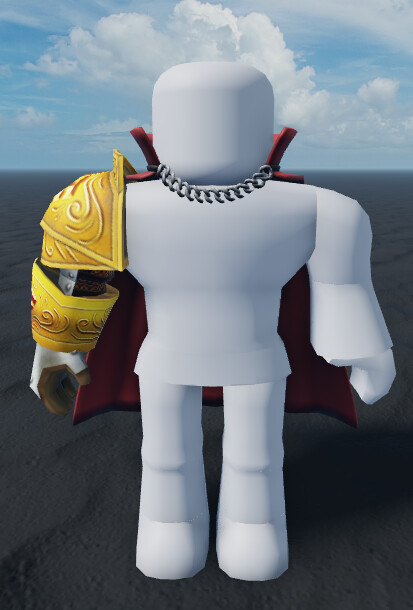
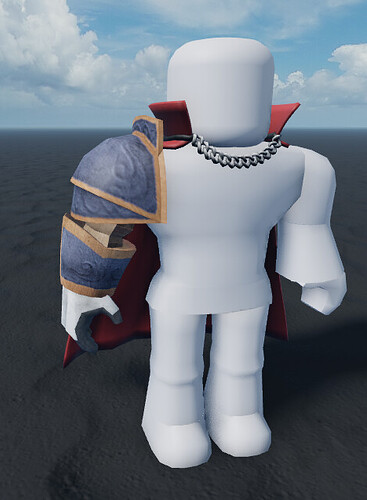
Once you do it for all the bodyparts on the chosen limb, it should look something like this. You can do this with any body part, and you can retexture them, which I’ll go over next.
How to retexture
Retexturing can be either really simple or hard, depends on what texture you are making.
You are gonna need some sort of software to retexture, you can use Paint. net, Clip studio paint, etc.
![]()
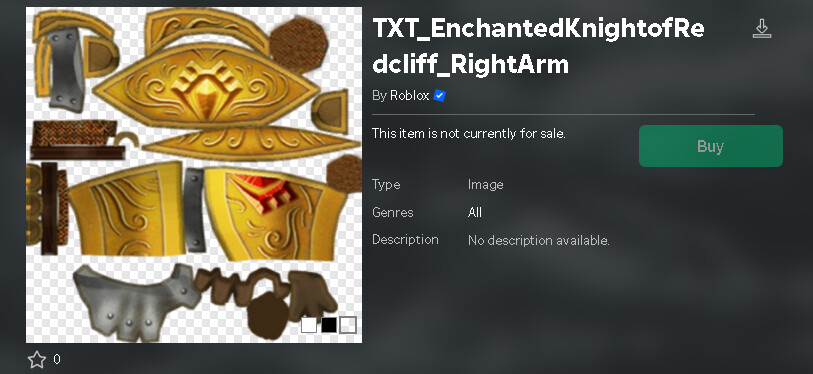
You are going to copy the Id and paste it into a roblox library link, like this :
https://www.roblox.com/library/548754278/TXT-EnchantedKnightofRedcliff-RightArm
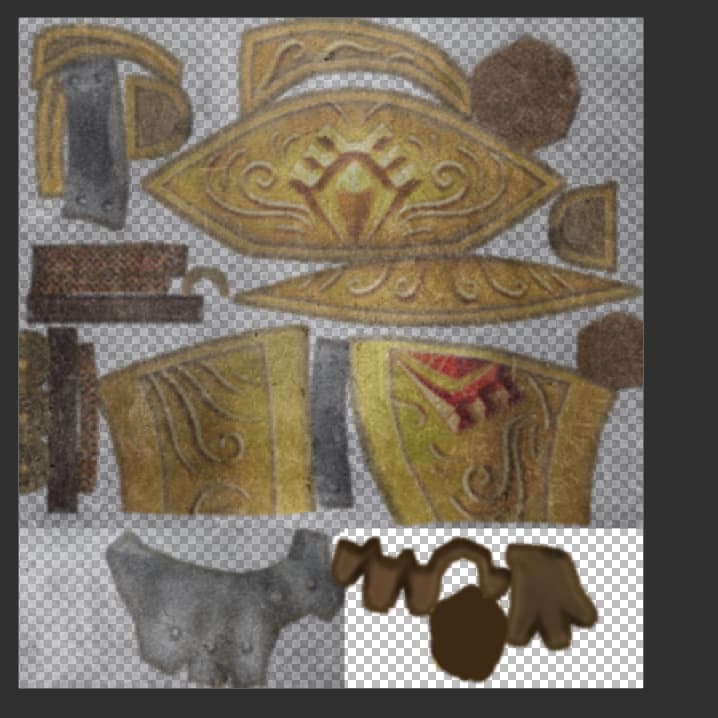
now that you have the image of the texture, you can either copy and paste it or download it and put into your paint software and edit it however you like.
After you finish your texture, save it into a file and upload it to roblox. Can be done either through the website or the Studio.

End result :

That is literally it. You can do this with accessories and decals also.
Recommended plugins
Here is a handful of links to help you make a rig.
https://create.roblox.com/store/asset/7194420519/Suitor-Fast-Outfit-Insertion
https://create.roblox.com/store/asset/1919609509/Wear-Bundle
And with this concluded, this should get you into the very basics of making a rig.
Catean made a handy tutorial on how to get the AO faces and assets in a “ethical” way :
Tips n' Tricks (might get updated)
You should change the accessory/bodypart material to the corresponding texture (having a metal like armor should use the metal roblox material).
Learn how to edit meshes in Blender, it can help you make your rigs look better.
Get a good sense of character design, don’t just make grand fire curse or supercurse users for fucks sake.
Other stuff
How To "Mix n' Mash"
“Mix n’ Mashing”, as me and JTN came to call it, is mashing two parts of a different bundle together.
To get started, you will want to find two different bundles/packages. I’ll be using the Headless Horseman feet and lower legs and Shadow Master upper legs.

Now that you have theese in the studio, you can start applying them to your rig. Theese have to be done manually.
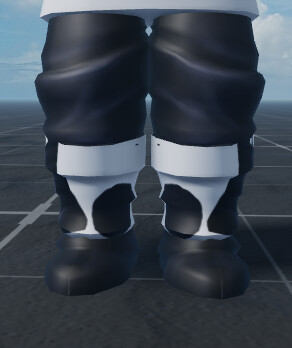
This is how the boots will probably look like if you done it correctly. To fix this issue, you will need to use your image editing software, and identify, which part of the texture affects which part of the mesh. for example :
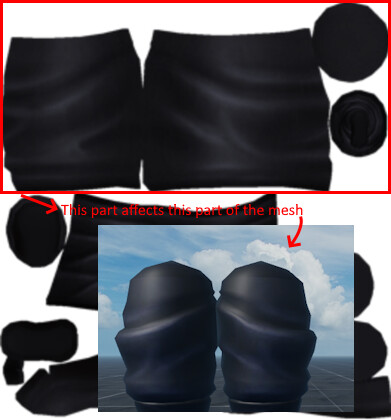
You do this for both or all three of the textures (yes this is possible with three parts also)
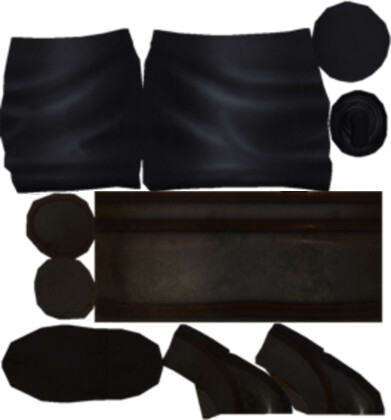
You can delete the texture that isn’t affected with that texture and replace it with the one you want to use.
So in the end, this is what your texture will look like :
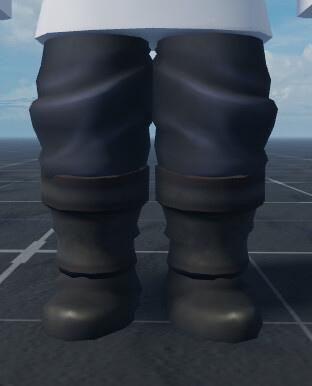
End result.
You can do this with any body part (except for the head ofc), you can also do this with three different meshes, but I believe you can figure that out yourself.
I recommend using this technique after you gain some basic skill in rigging.
AO Rig starter pack
https://create.roblox.com/store/asset/76047096208022/AO-Character-Starter-Pack?externalSource=www&assetType=Model
This was made with the help of @JTN.